You wanted to build deep learning networks. You discovered TensorFlow library through a Google search or Udacity course and decided to try it out, as you like Python. You looked through the sample pieces of code, recognized digits and tried to optimize it. It was exhilarating!
So, now you are ready to use it in a real problem at work, home or Kaggle. As you start writing your code from scratch, things start sounding more difficult than that tutorial led on. What now?
If that is where you find yourself, this article is for you. Though this is not meant to be full tutorial end to end, it will give you some pointers on how to make things work more easily in the world of TensorFlow.
Computation Model Basics
This is basic stuff, but just a reminder just in case it was not obvious the first time.
Mean Scaling
For any deep learning or neural network problem, mean scaling the data is really important. Assuming you have your data in a Pandas data frame, you can use this:
[code lang=”python”]
def mean_scaling(samples, feature_cols):
”’
Input:
– samples: The data in the pandas dataframe
– feature_cols: a list of column names on which to apply mean scaling
Returns: a mean-scaled data frame with all input columns, but with specific columns replaced with mean scaled values
”’
mean_set = samples.loc[:, feature_cols].mean(axis=1)
stdev_set = samples.loc[:, feature_cols].std(axis=1)
examples = samples.loc[:, feature_cols].subtract(mean_set, axis=0).div(stdev_set, axis=0).fillna(0.0).as_matrix()
return examples
[/code]
Graph Computation
TensorFlow (TF) is based on principles of symbolic computation and Directed Acyclic Graphs. In many ways, the model is closer to Numpy. See these lecture notes for some details on how to map Numpy to TensorFlow in your head.
Basically, TF code we write is doing the following things:
[code lang=”text”]
# Part 1: Define
in context of a TF graph:
define some constants, variables, placeholders etc
define a way to initialize the starting values of these variables
define computations using these variables
# Part 2: Compute
create a TF session with the above defined graph:
ask the session to initialize the variables
in a loop (for training or prediction for example):
ask the session to evaluate some computation defined in the graph. Ask the session to return the value of the computation if desired
[/code]
Please note that the loop in Part 2 above is optional. It is usually there during training especially if you are running training using mini-batches. If you were trying to predict on a trained model, and all the data used for prediction could fit in memory, then you wouldn’t need to run a loop.
Key point to note: in part 1, all you are defining is a symbolic computation. This computation is not performed until explicitly asked for evaluation inside an active TF session.
to give a specific example:
[code lang=”python”]
our_graph = tf.Graph()
with our_graph.as_default():
a = 10
b = 20
c = a * b # at this point, c=200
d = tf.Variable(tf.truncated_normal([10, 40])) # (1)
e = tf.Variable(d.initialized_value() * 2.0) # (2)
# Add the variable initializer Op.
init = tf.initialize_all_variables()
[/code]
In the code above, normal Python variables work just like you would expect. In (1) above, a variable is defined, and the initialization is using a truncated normal distribution. This particular line above will generate 10 values, centered around 40, and standard deviation of 1.0 . But, nothing happens unless you run in it in a session. Hence, if you want to define another variable that depends on this variable, as defined in e (2) above, you have to be careful to use the initialized version of d.
These variables and computation defined above is only available when the following executes:
[code lang=”python”]
with tf.Session(graph=our_graph) as sess:
sess.run(init) # Bingo!
[/code]
After the above code executes, only then d and e have values.
Organizing and Reusing Code
Now that you are ready with the basics, and want to write your out your graph/network architecture. As I was going through testing various models, I was adding layers, changing drop outs, trying different optimizers, changing mini-batch sizes etc. Example code was not well suited to do these experiments. Digging deeper into tutorials on the TF website, I discovered some ways of organizing code better. Here are some ways.
Reusable Code for Building Layers
It is pretty easy to define reusable functions to create layers for your models. Feel free to use the examples below:
[code lang=”python”]
# utility function to create FC layers
def get_fc_layer(layer_name, n_txn, num_inps, hidden_units, output_type=’RELU’):
with tf.variable_scope(layer_name): # (1)
weights = tf.get_variable(‘weights’, initializer=tf.truncated_normal([num_inps, hidden_units],
stddev=1.0 / math.sqrt(float(num_inps)))) # (2)
biases = tf.get_variable(‘biases’, initializer=tf.zeros([hidden_units]))
pre_activate = tf.matmul(n_txn, weights) + biases # (3)
if output_type == ‘RELU’: # (4)
layer = tf.nn.relu(pre_activate)
elif output_type == ‘SIGMOID’:
layer = tf.sigmoid(pre_activate)
else:
raise ValueError
drop_outlayer = tf.nn.dropout(layer, keep_prob) # (5)
return drop_outlayer
# Create a function that creates one-dimensional convolutional layers
def conv1d_relu(layer_name, input, kernel_shape, bias_shape, stride): # (6)
with tf.variable_scope(layer_name):
# Create variable named "weights".
weights = tf.get_variable("weights", kernel_shape,
initializer=tf.random_normal_initializer())
# Create variable named "biases".
biases = tf.get_variable("biases", bias_shape,
initializer=tf.constant_initializer(0.0))
conv = tf.nn.conv1d(input, weights,
stride=stride, padding=’VALID’)
return tf.nn.relu(conv + biases)
#
# TBD: add generic function to add max pooling layers
# left as an exercise for the reader
[/code]
First function creates a fully connected layer. It gives a choice of two output activation functions, ReLU, or Sigmoid.
These notes give a lot more detail on ReLU, sigmoid, tanh etc and where to use them. Here is a snippet:
TLDR: “What neuron type should I use?” Use the ReLU non-linearity, be careful with your learning rates and possibly monitor the fraction of “dead” units in a network. If this concerns you, give Leaky ReLU or Maxout a try. Never use sigmoid. Try tanh, but expect it to work worse than ReLU/Maxout.
Both the functions have similar structure, so lets walk through the first one. Inputs to the function are:
* Layer name: This is used to make sure that each layer in the graph and it’s variables are kept properly namespaced. It is very useful when you are trying to debug or visualize the network. More on visualizing the network later.
* n_txn: This is set of input data that this layer will work on. It could be data read from a file, or output of a previous layer
* num_inps : This is the number of columns in the inputs
* hidden_units : this is the number of units (neurons) in this layer. The output layer will have number of rows in n_txn and hidden_units number of columns. This is important to note as you string multiple layers together.
* output_type : This allows you to choose between different activation functions. Code here provides two options. It should be trivial to add more options here.
To further explain how this works, focus on the lines with the comment numbers:
- Variable scope: This line creates a scope under which variables will be declared, using the layer name passed in. this how-to on TF site will give a lot of detail around how to use it. This practice is highly recommended. This will become more and more valuable as you build bigger and bigger networks and are trying to figure out where something is happening.
- Weights: Please note the use of
tf.get_variableinstead oftf.Variable. This is primarily to setup variables for reuse. More on variable use in the next section. Second thing to consider here is the initialization function. This is a nifty trick using truncated normal and setting the standard deviation using number of inputs. You could enhance this code by supplying the initialization function as an argument to the function. - Pre-activation: This is just a matrix multiplication step. Usually, this step is not separated from the activation layer. This has been separated for two reasons:
- It allows plugging in of different activation functions
- It allows better debugging and seeing how the output is turned into an activation. When TensorBoard is plugged in later, then we will be able to see the different between pre-activations and output from activation function applied.
- Selection of output activation function: a very simple way to select which output activation to use. This could be improved with addition of different activation function types. In my work, we use sigmoid only in the last output layer as we have a multi-class classification problem.
- Drop out layer: Note that dropout needs to be applied only in training. It should not be applied during prediction. using placeholder variables, you can supply different values to this during session runs.
So how do you use this to construct arbitrary networks? Here is a code snippet that shows that:
[code lang=”python”]
our_graph = tf.Graph()
with our_graph.as_default():
keep_placeholder = tf.placeholder(tf.float32) # used to store the drop out value to be used in a FC layer
inputs_placeholder = tf.placeholder(tf.float32, shape=(BATCH_SIZE, NUM_INPUTS, num_channels))
labels_placeholder = tf.placeholder(tf.int16)
kernel1_shape = [patch_size, num_channels, depth]
layer1 = conv1d_relu(‘cnnlayer1’, inputs_placeholder, kernel1_shape, [depth], stride)
kernel2_shape = [patch_size, depth, depth] # second layer now has multiple channels from previous output
layer2 = conv1d_relu(‘cnnlayer2’, layer1, kernel2_shape, [depth], stride) # keeping depth and stride same
# reshaping before passing to FC layer
shape = layer2.get_shape().as_list()
reshape = tf.reshape(layer2, [shape[0], shape[1] * shape[2]])
num_hidden = 64 # lets say FC layer has 64 hidden neurons
# we want dropout as passed in from running the session
layer3 = get_fc_layer(‘fclayer1’, reshape, shape[1] * shape[2],
num_hidden, keep_prob=keep_placeholder)
# now the output layer
logits = get_fc_layer(‘fcoutputlayer’, layer3, num_hidden, NUM_OUTPUTS,
keep_prob=keep_placeholder, output_type=’SIGMOID’)
[/code]
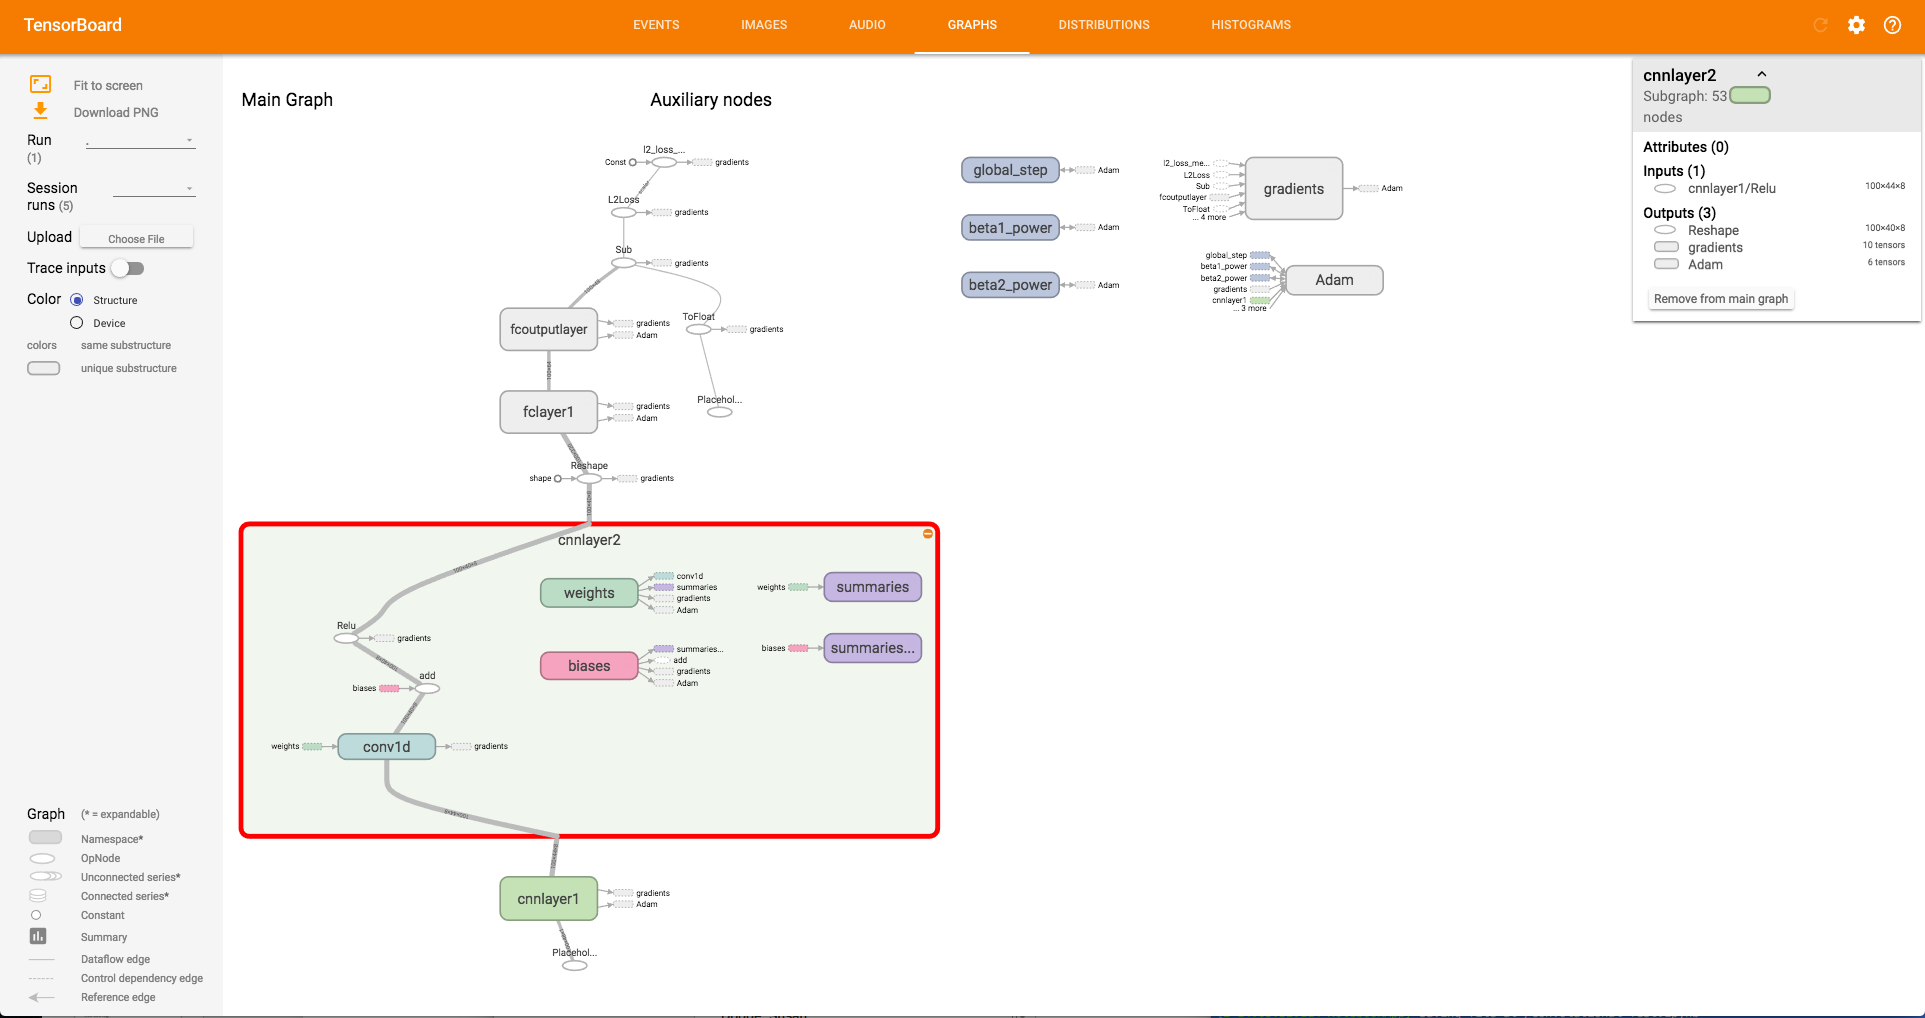
To see how this network looks, here is a picture from TensorBoard.

To run this network, code could look like this:
[code lang=”python”]
with tf.Session(graph=openhours_graph) as sess:
# Run the Op to initialize the variables.
sess.run(init)
# Start the training loop.
results = []
for step in xrange(MAX_STEPS):
# Read a batch of examples and labels.
example_batch, label_batch = get_random_batch(data_train, BATCH_SIZE, FEATURES, LABELS) # helper function to get mini batches of data
# Run one step of the model. The return values are the activations
# from the `train_op` (which is discarded) and the `loss` Op. To
# inspect the values of your Ops or variables, you may include them
# in the list passed to sess.run() and the value tensors will be
# returned in the tuple from the call.
prediction_batch, _, loss_value = sess.run([logits, optimizer, l2_loss],
feed_dict={inputs_placeholder: example_batch,
labels_placeholder: label_batch,
keep_placeholder: 0.5})
# Prediction work
example_batch, label_batch = get_random_batch(data_test, BATCH_SIZE, FEATURES, LABELS)
prediction_batch = sess.run(logits,
feed_dict={inputs_placeholder: example_batch,
labels_placeholder: label_batch,
keep_placeholder: 1.0}) # in testing, no dropout ever!
[/code]
Code snippets above don’t show the calculation for optimizer and loss, so this snippet wont run as is. But, you could supply those based on your functions. We discuss defining cost functions in the section below.
Reusing Variables
Now that we can add more layers to the network with only two lines of code, and enable/disable dropout with a couple of key strokes, the question is how to define the cost function? Adding layers on demand makes calculating the cost function harder to manage. Number of layers, and consequently number weights/biases are variable. Hence, a cost function which includes regularization (always a good idea), is difficult to write. Here is a simple helper function to solve that:
[code lang=”python”]
def calc_regularization(layer_names):
”’ This function assumes weights in all layers are named ‘weights’ ”’
regularization = 0
for layer in layer_names:
with tf.variable_scope(layer, reuse=True): # NOTE reuse=True
regularization += tf.nn.l2_loss(tf.get_variable(‘weights’))
return regularization
# Create an operation that calculates loss.
labels = tf.to_float(labels)
l2_loss = tf.nn.l2_loss(tf.sub(logits, labels))
# regularization
regularizer = calc_regularization([‘fclayer1’, ‘fcoutputlayer’]) # NOTE: just pass layer names in a list
l2_loss += beta * regularizer
loss = tf.reduce_mean(l2_loss, name=’l2_loss_mean’)
opt = tf.train.MomentumOptimizer(learning_rate, momentum=0.5)
train_op = opt.minimize(loss)
[/code]
As long as you can pass layer names as a list, regularization works. The key here is to use get_variable to define the variable. This allows values of those variables to be recalled in specific parts of the code and shared.
More details about this part in here and here.
Debugging / Visualizing Execution aka TensorBoard
You saw a picture of the network up above. Wouldn’t it be nice to see such outputs from your network executions? TensorBoard is shipped as part of the TensorFlow library. It generates pretty graphs and visualizations that help you understand how the network is actually working.
So, in this section, we will update the code we wrote above to include monitoring for TensorBoard. Basically, monitoring writes data consumable by TensorBoard in to a file. TensorBoard reads it in from that file. Thus it can display results in near real time, as the model is being read in.
First, lets write a reusable function to writes a lot of the data as summaries:
[code lang=”python”]
def variable_summaries(var, name):
”’Attach a lot of summaries to a Tensor.
used for visualization with tensorboard
”’
with tf.name_scope(‘summaries’):
mean = tf.reduce_mean(var)
tf.scalar_summary(‘mean/’ + name, mean)
with tf.name_scope(‘stddev’):
stddev = tf.sqrt(tf.reduce_mean(tf.square(var – mean)))
tf.scalar_summary(‘stddev/’ + name, stddev)
tf.scalar_summary(‘max/’ + name, tf.reduce_max(var))
tf.scalar_summary(‘min/’ + name, tf.reduce_min(var))
tf.histogram_summary(name, var)
[/code]
What this method does is add a node called summaries in the overall graph. It adds nodes inside it to capture mean, max, min and standard deviation of values/parameters. Now, we can rewrite our generic layer functions and add this in.
[code lang=”python”]
# utility function to create FC layers
def get_fc_layer(layer_name, n_txn, num_inps, hidden_units, output_type=’RELU’):
with tf.variable_scope(layer_name): # (1)
weights = tf.get_variable(‘weights’,
initializer=tf.truncated_normal([num_inps, hidden_units],
stddev=1.0 / math.sqrt(float(num_inps)))) # (2)
biases = tf.get_variable(‘biases’, initializer=tf.zeros([hidden_units]))
pre_activate = tf.matmul(n_txn, weights) + biases # (3)
if output_type == ‘RELU’: # (4)
layer = tf.nn.relu(pre_activate)
elif output_type == ‘SIGMOID’:
layer = tf.sigmoid(pre_activate)
else:
raise ValueError
drop_outlayer = tf.nn.dropout(layer, keep_prob) # (5)
# lets add some summaries
if VERBOSE:
variable_summaries(weights, layer_name + ‘/weights’)
variable_summaries(biases, layer_name + ‘/biases’)
tf.histogram_summary(layer_name + ‘/pre-activations’, pre_activate)
tf.histogram_summary(layer_name + ‘/activations’, layer)
tf.histogram_summary(layer_name + ‘/dropout’, drop_outlayer)
return drop_outlayer
# Create a function that creates one-dimensional convolutional layers
def conv1d_relu(layer_name, input, kernel_shape, bias_shape, stride): # (6)
with tf.variable_scope(layer_name):
# Create variable named "weights".
weights = tf.get_variable("weights", kernel_shape,
initializer=tf.random_normal_initializer())
# Create variable named "biases".
biases = tf.get_variable("biases", bias_shape,
initializer=tf.constant_initializer(0.0))
conv = tf.nn.conv1d(input, weights,
stride=stride, padding=’VALID’)
# adding summaries for TensorBoard
if VERBOSE:
variable_summaries(weights, layer_name + ‘/weights’)
variable_summaries(biases, layer_name + ‘/biases’)
tf.histogram_summary(layer_name + ‘/activations’, conv)
return tf.nn.relu(conv + biases)
# TBD: add generic function to add max pooling layers
# left as an exercise for the reader
[/code]
A VERBOSE parameter was added to give control over whether summaries should be written out or not. This can be useful to turn off when you are confident about the network working as desired.
Before TensorBoard starts writing output, it needs to be configured with a path where to save the summaries. In the section above where the graph has been defined, this can be accomplished by adding this:
[code lang=”python”]
merged = tf.merge_all_summaries()
train_writer = tf.train.SummaryWriter(TRAIN_DIR + ‘/train’,
graph=openhours_graph)
[/code]
It assumes there is a variable TRAIN_DIR that has been setup with the path for storing training output. This path is important as you need it when starting the TensorBoard visualization service.
The last part of this involves setting up some code during the training steps to see how things are working. In the training loop (partially shown above), you can add some statements that log this data. It is not advisable to do this for every step, otherwise training will be slowed down considerably. In this example, we log every 1000 steps.
[code lang=”python”]
# code snippet
for step in xrange(MAX_STEPS):
# Read a batch of examples and labels.
example_batch, label_batch = get_random_batch(data_train, BATCH_SIZE, FEATURES, LABELS)
if step % 1000 != 0:
# Run one step of the model. The return values are the activations
# from the `train_op` (which is discarded) and the `loss` Op. To
# inspect the values of your Ops or variables, you may include them
# in the list passed to sess.run() and the value tensors will be
# returned in the tuple from the call.
prediction_batch, _, loss_value = sess.run([logits, optimizer, l2_loss],
feed_dict={inputs_placeholder: example_batch,
labels_placeholder: label_batch,
keep_placeholder: 0.5})
else:
run_options = tf.RunOptions(trace_level=tf.RunOptions.FULL_TRACE)
run_metadata = tf.RunMetadata()
summary, prediction_batch, _, loss_value = sess.run([merged, logits,
optimizer, l2_loss],
feed_dict={inputs_placeholder: example_batch,
labels_placeholder: label_batch,
keep_placeholder: 0.5},
options=run_options, run_metadata=run_metadata)
train_writer.add_run_metadata(run_metadata, ‘step%03d’ % step)
train_writer.add_summary(summary, step)
[/code]
Now you are all set! Invoke TensorBoard from the command line to start serving:
$ tensorboard --logdir=TRAIN_DIR/train
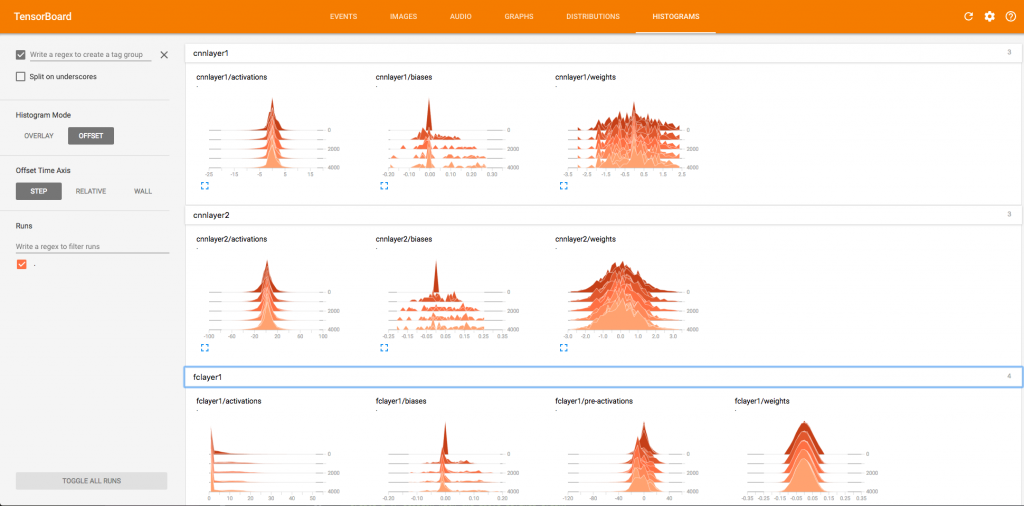
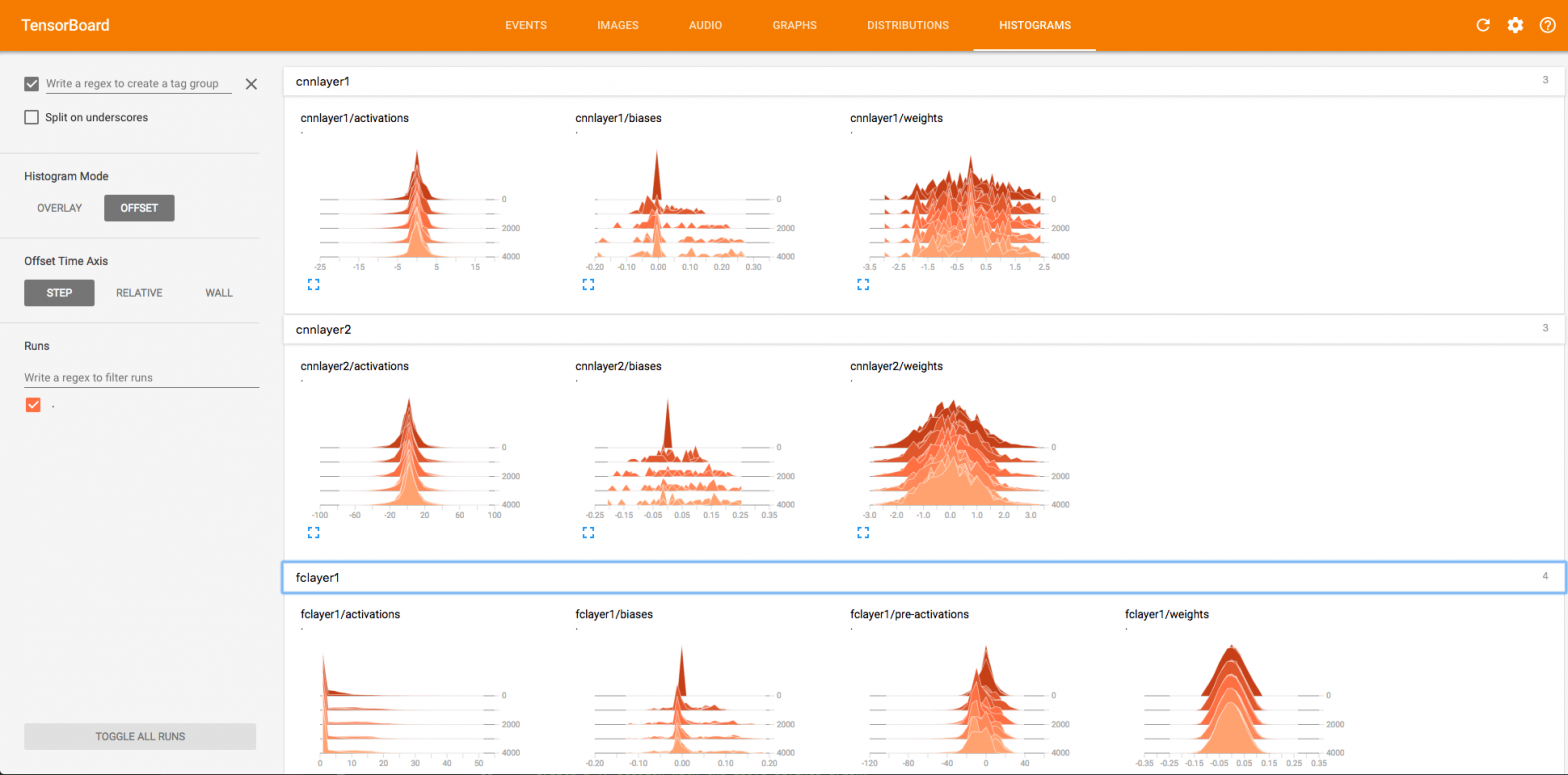
and navigate to http://localhost:6006 to visualize the output. Here is an example histogram plot showing output of a fully connected layer.

Conclusion
Hope this was useful for you to organize your code better and make TensorFlow work for you! Go forth and classify cucumbers!

